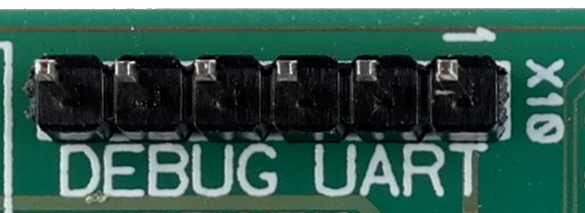
TTL Converter Terminal Connection
This section shows you how to connect your Development Kit with a host computer to login to a terminal.
Wiring
If you are using the USB-to-TTL cable shipped with our modules, the Black wire always goes to GND or Number 1 Pin. The other side of course is plugged into your host computer.

Accessing
Linux
Note
This section was tested on Ubuntu 16.04.
Install minicom:
sudo apt install minicom
Power on the board.
Use the TTL to USB Serial Converter cable to connect your computer with the board.
Get the right ttyUSB instance:
ls /dev/ttyUSB*
/dev/ttyUSB0
Connect minicom to the /dev/ttyUSB0 device:
minicom -D /dev/ttyUSB0 -t linux
The necessary communication parameters are decribed in Terminal Settings
Tip
You should consider using minicom with logfiles. They can be enabled with the -C option. An example would be: minicom -D /dev/ttyUSB0 -t linux -C ${HOME}/log/minicom/minicom_usb0_$(date +%Y-%m-%d).log.
Note
By default you can quit minicom CTRL + A and then Q.
Note
If minicom does not show any target output following connection, reset the board/MCU.
Windows
You will need a host computer with a terminal program, e.g. PuTTY.
The following example is for a Windows 10 host system.
Power on the board.
Use the TTL to USB Serial Converter cable to connect your computer with the board.
Check the Device Manager to see as which COM the USB connected.
For example, it would come up as COM9, configure PuTTY as follows:

Hit “Open” and you should get terminal access to your board. Sometimes you have to hit the [Enter] key before you get an output.
Hint
If your computer is not recognizing the TTL to USB Serial Converter cable you might try installing this driver: http://www.ftdichip.com/Drivers/CDM/CDM21228_Setup.zip