QT Guide
Requirements
For creating the QT6 toolchain a complete Yocto build environment is required.
Depending on your module choose the correct guide - if not already set up.
Note
QSXP, QSXM, QS8M, TX8M, TX8P use NXP Yocto BSP Guide
Note
QSRZ, QSMP, TXRZ, TXMP, TX6, TXUL use Mainline Yocto BSP Guide
Build
Setup the Yocto build-directory as described in the Yocto guide for your machine. Use the following values:
DISTRO=karo-waylandMACHINE=<desired-machine>
Build the image for your target:
bitbake karo-image-qt6
Program your board using our Flashtools. You can also boot the image from net/tftp.
Build the SDK:
bitbake meta-toolchain-qt6
Installing SDK
To install the previously built SDK on your host, simply run:
<your-build-directory>/tmp/deploy/sdk/<sdk-architechture-depending-install-script-name>.sh
Hint
It is recommended to install every toolchain into a seperate folder inside /opt/
Installing QT Creator
Download the QT Creator offline installation for Linux from https://www.qt.io/offline-installers and execute the .run file. This will install the QT Creator for you.
Setup QT Creator
Now we have to tell QtCreator to use our previously installed SDK.
SDK
Start QT Creator, go to and select the Kits section.
Configure Qt Versions (qmake), Compilers and Debuggers as shown in the following screenshots. Of course you have to fit the paths depending on your SDK.
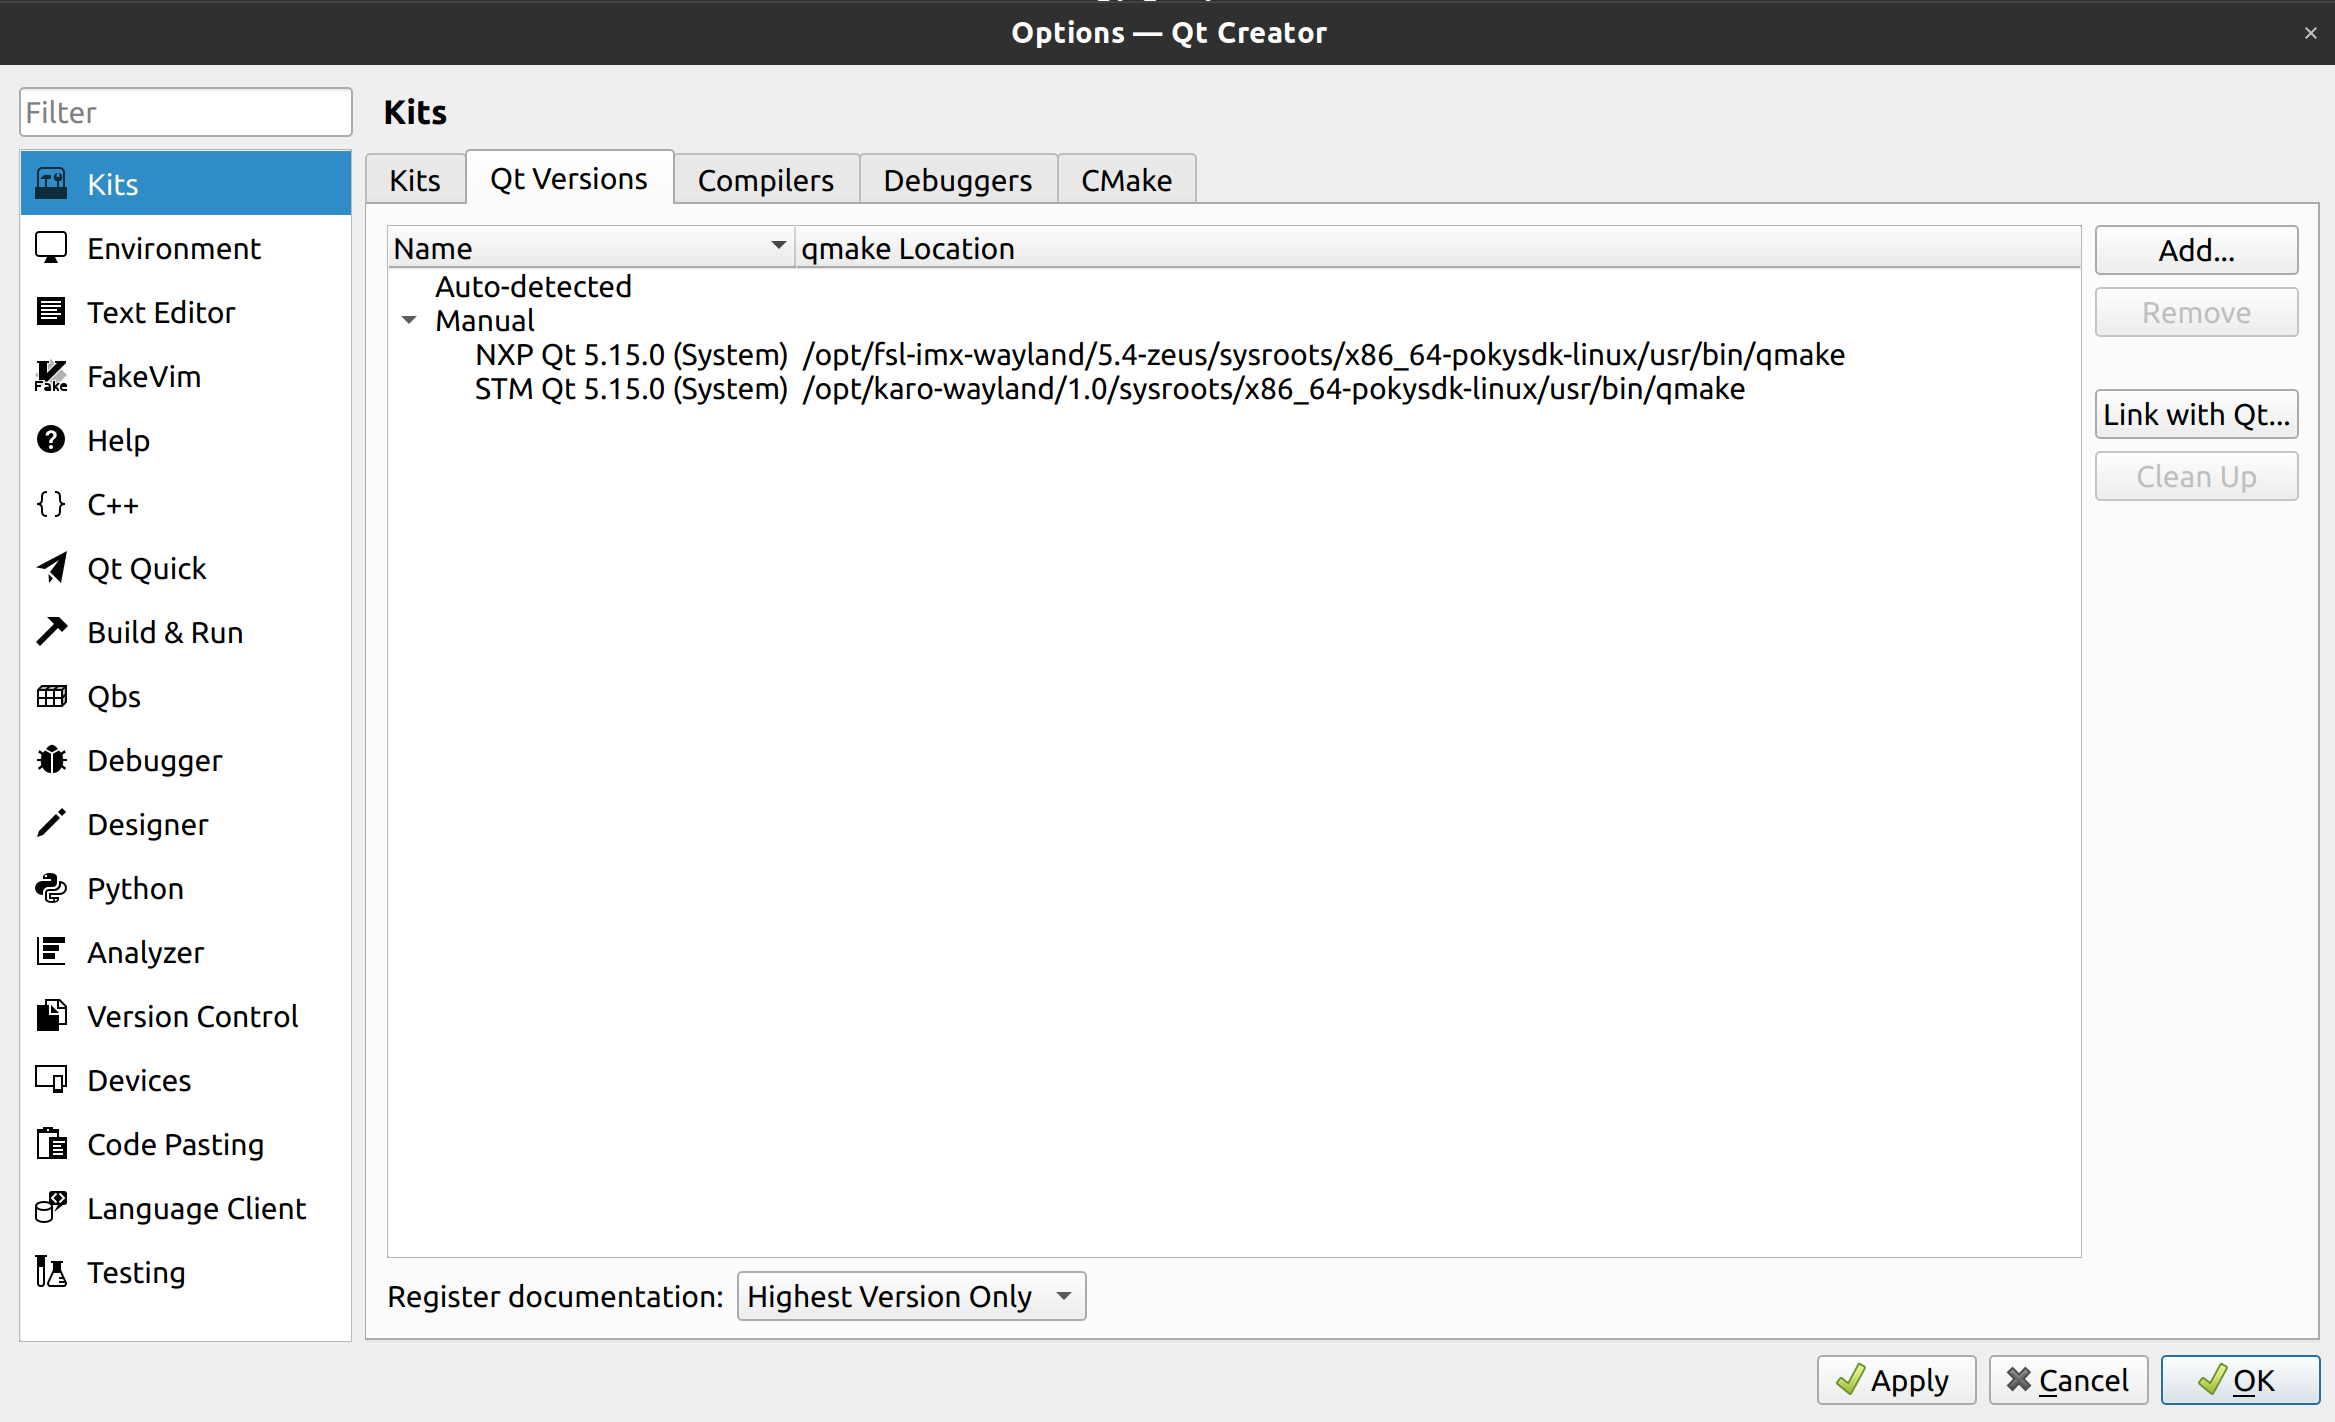
QT Versions
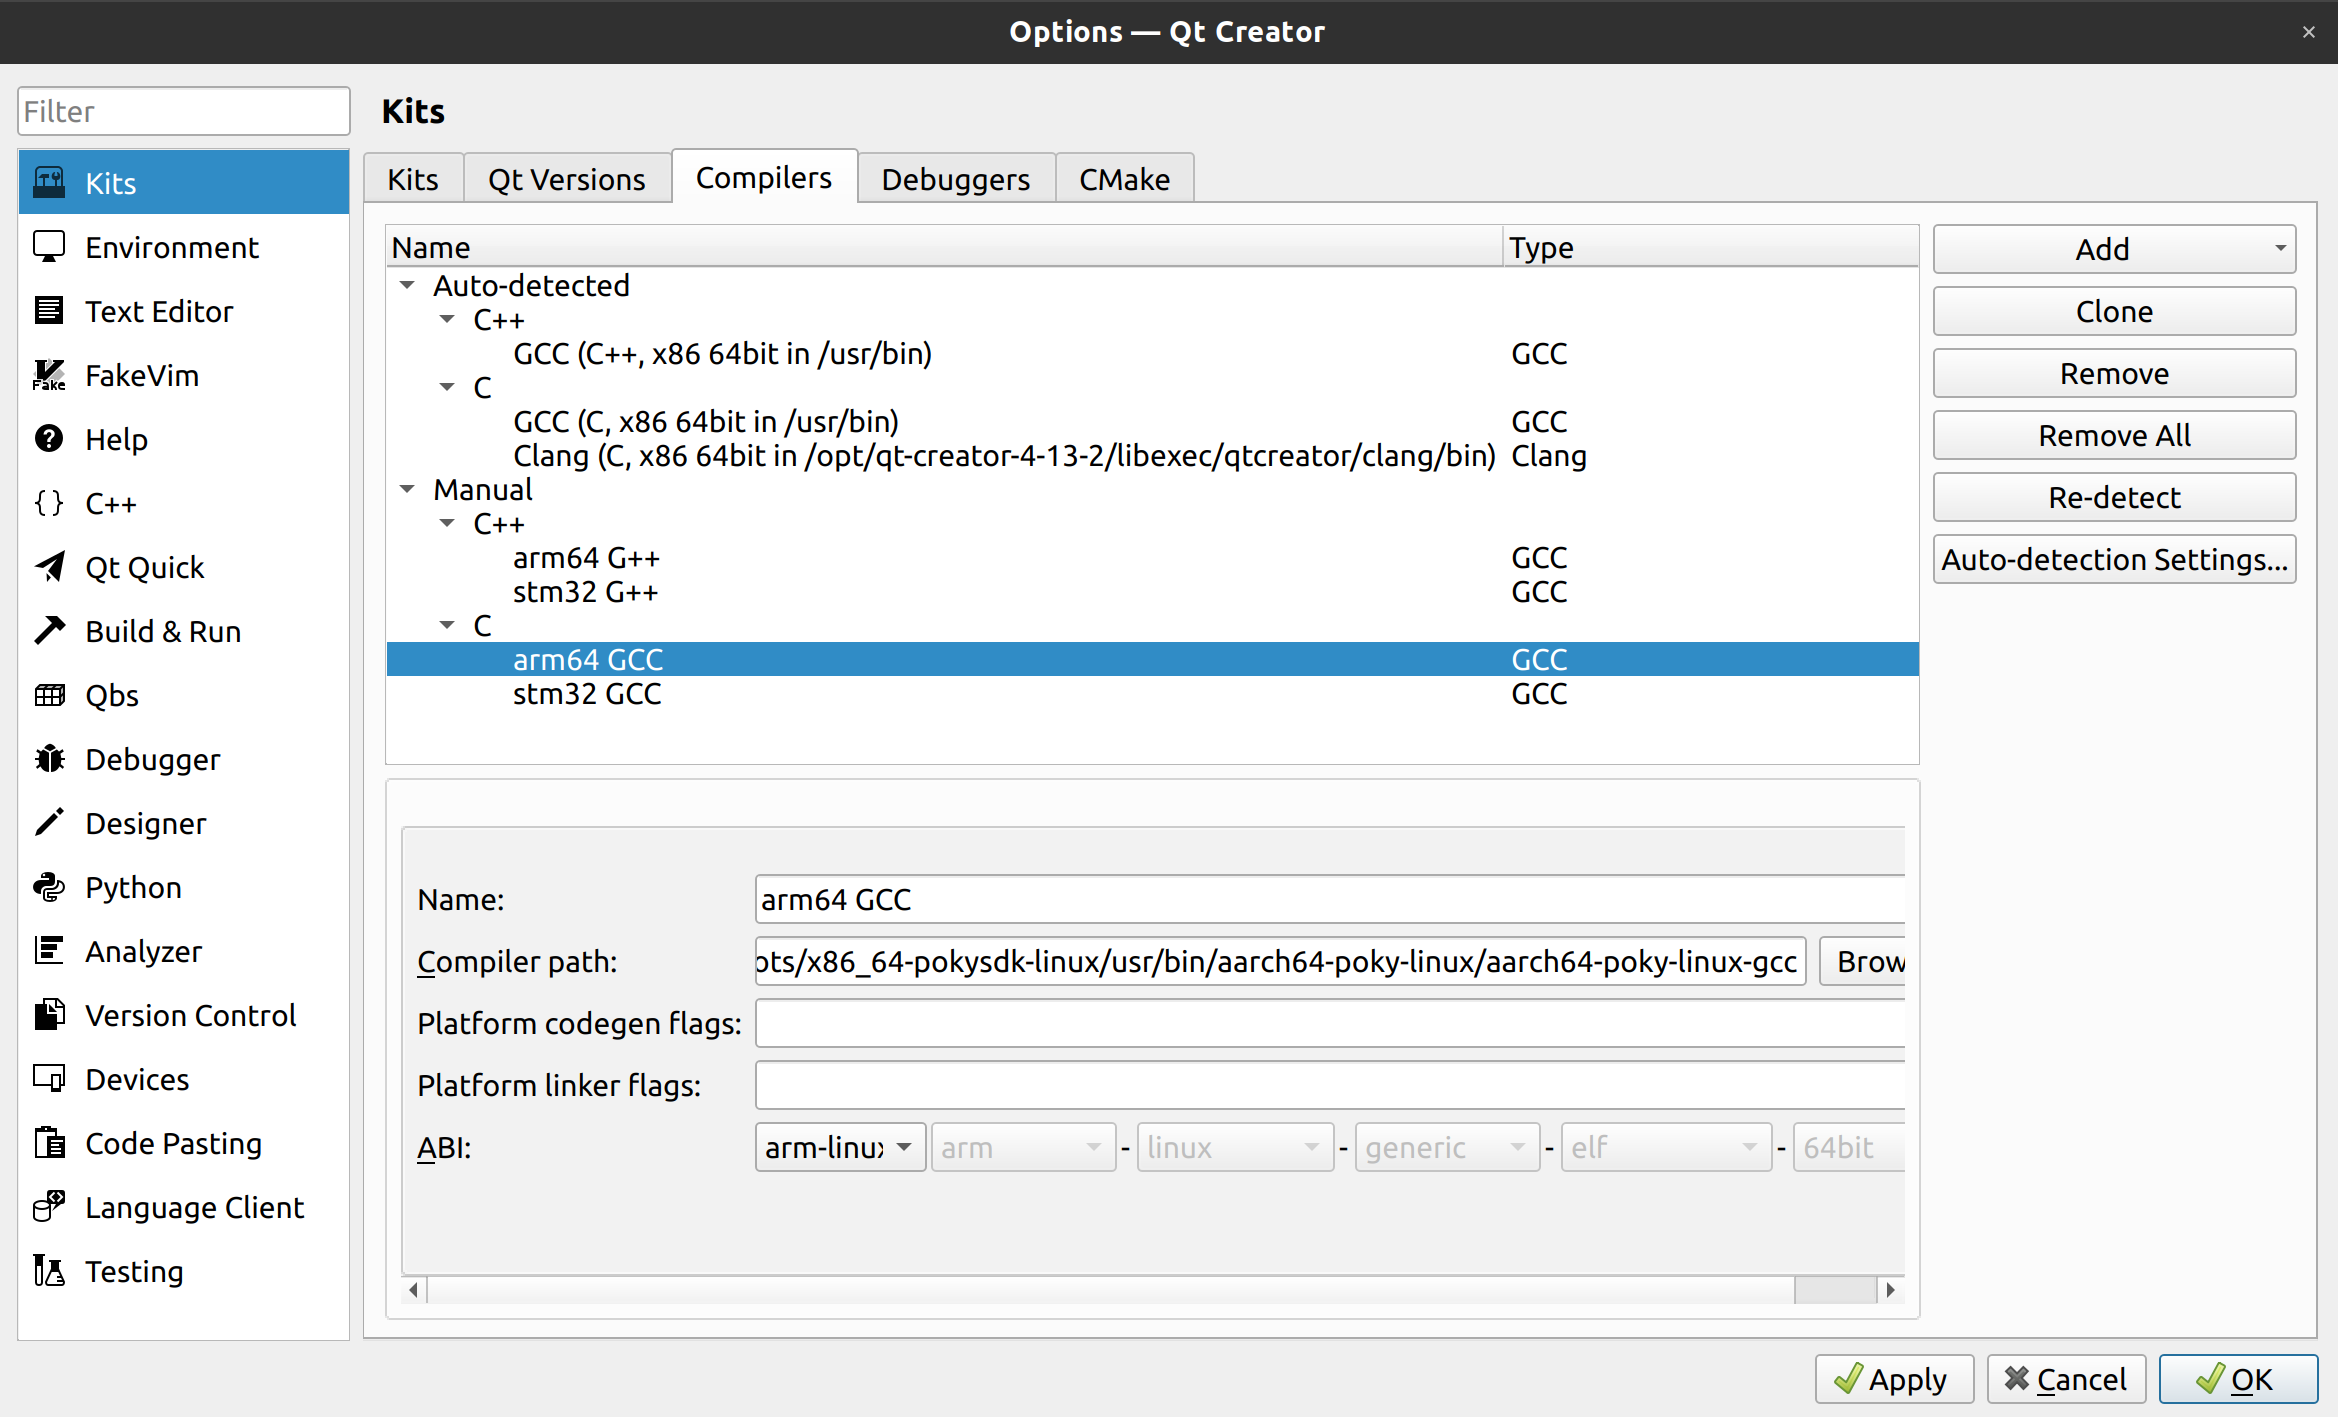
C Compilers
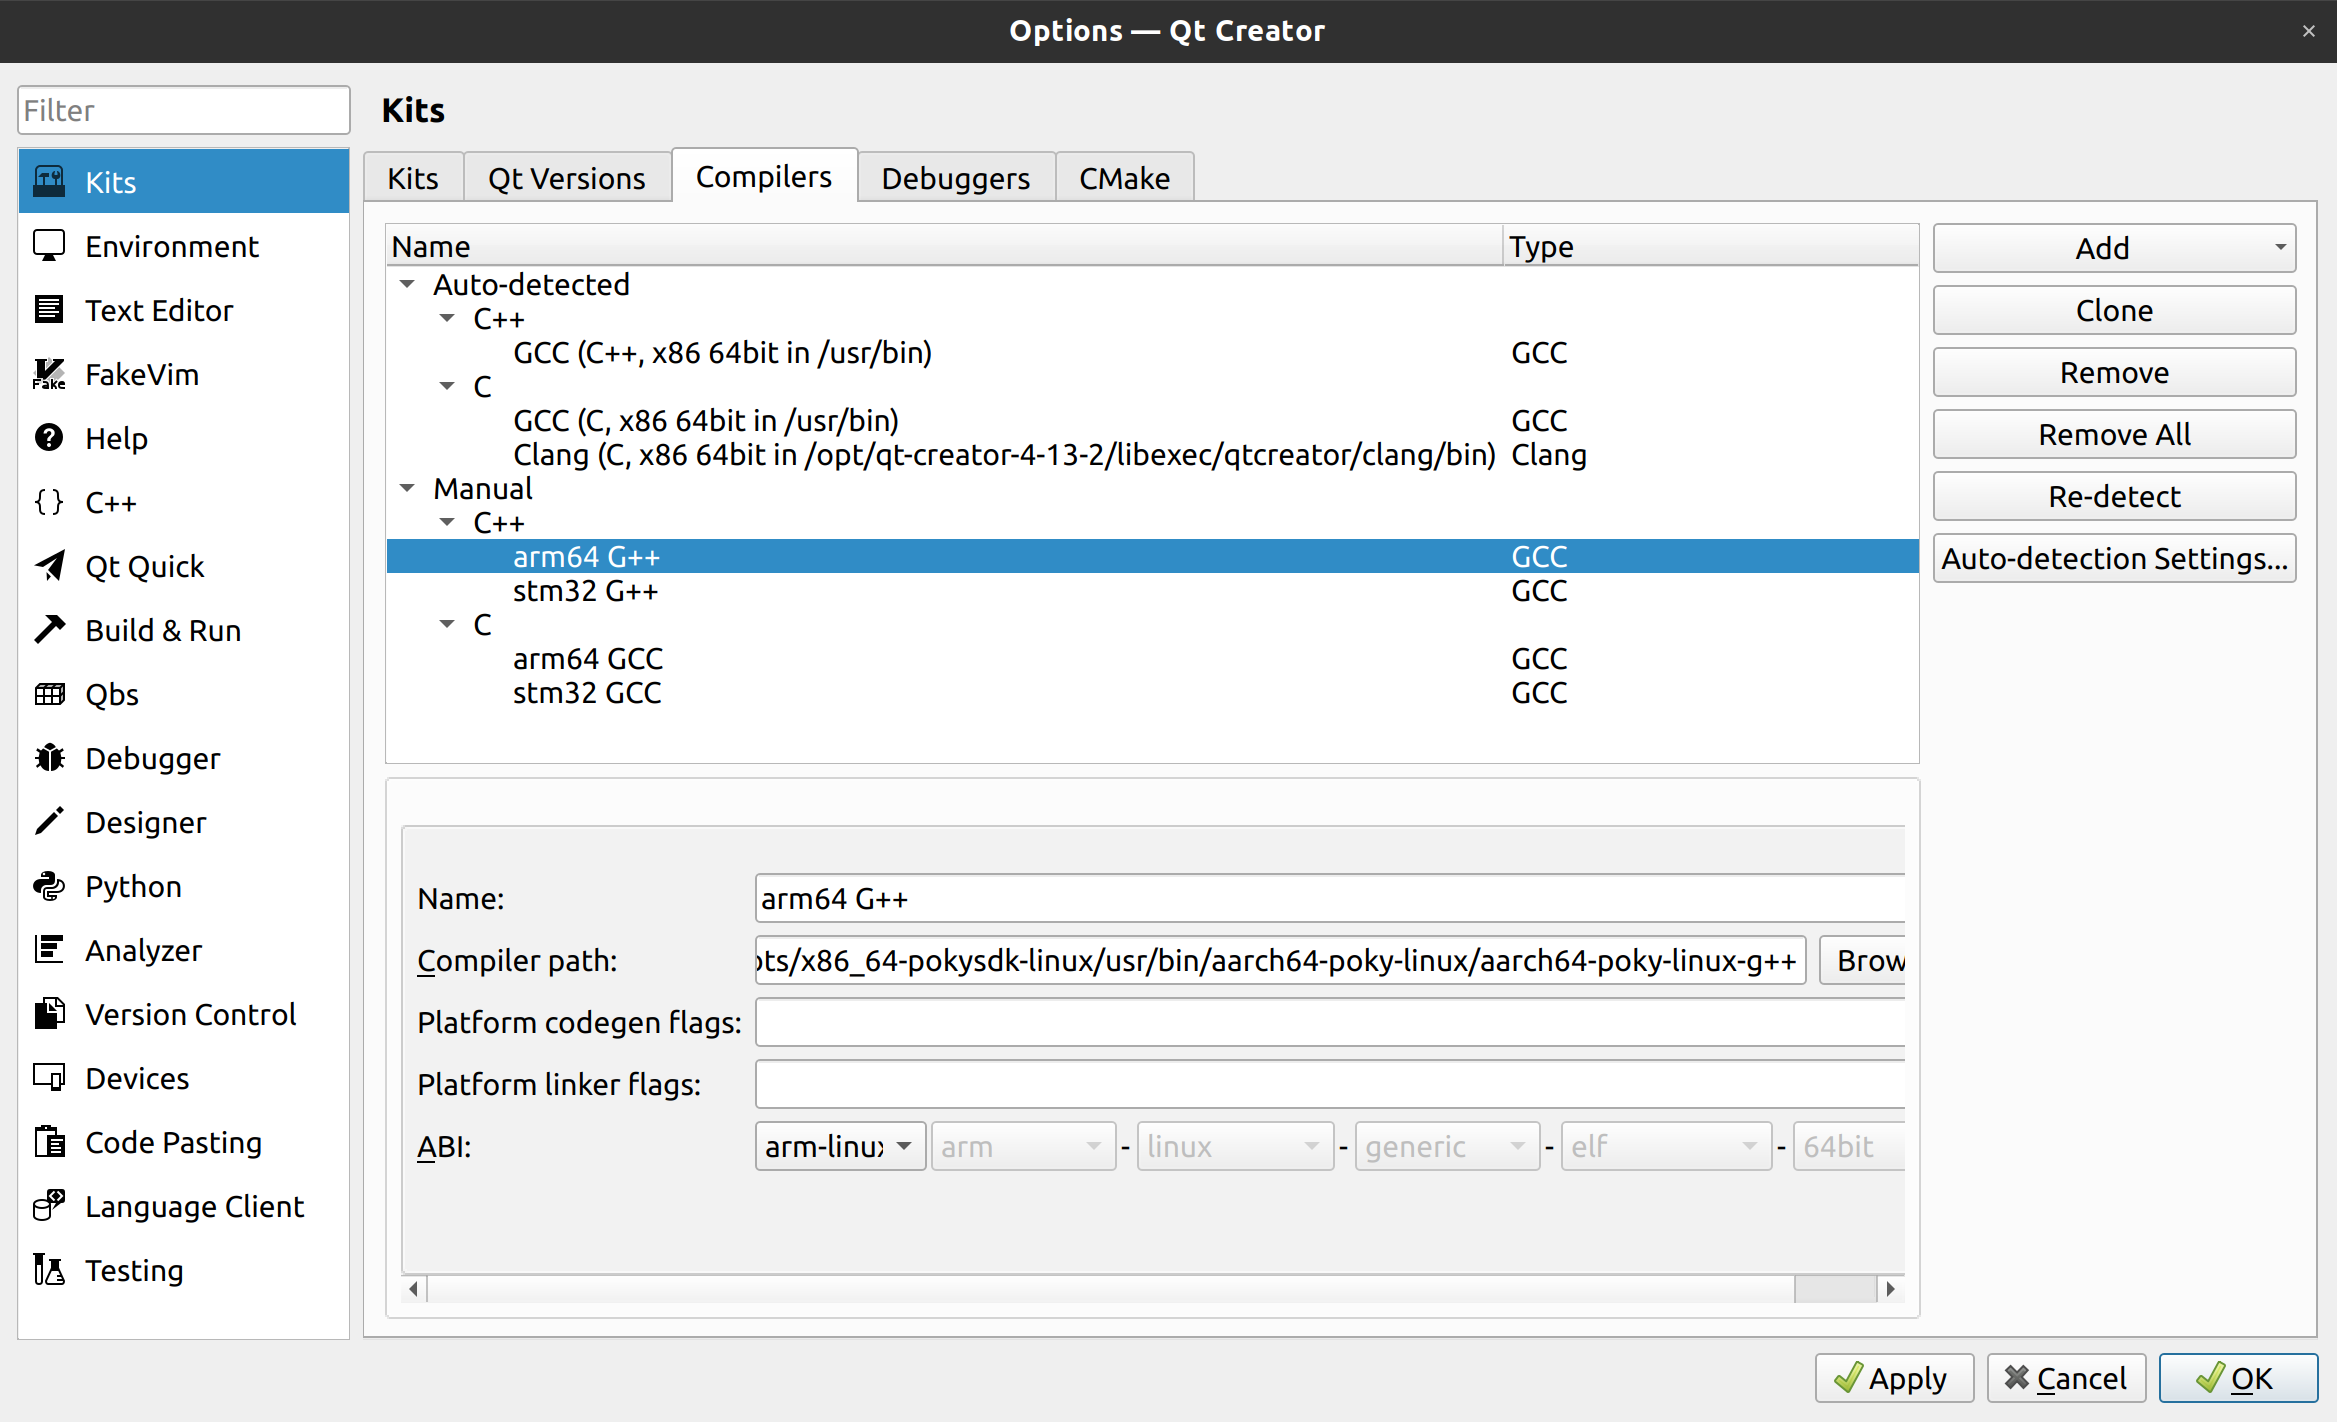
C++ Compilers

Debuggers
Go to the CMake section and add cmake executable.
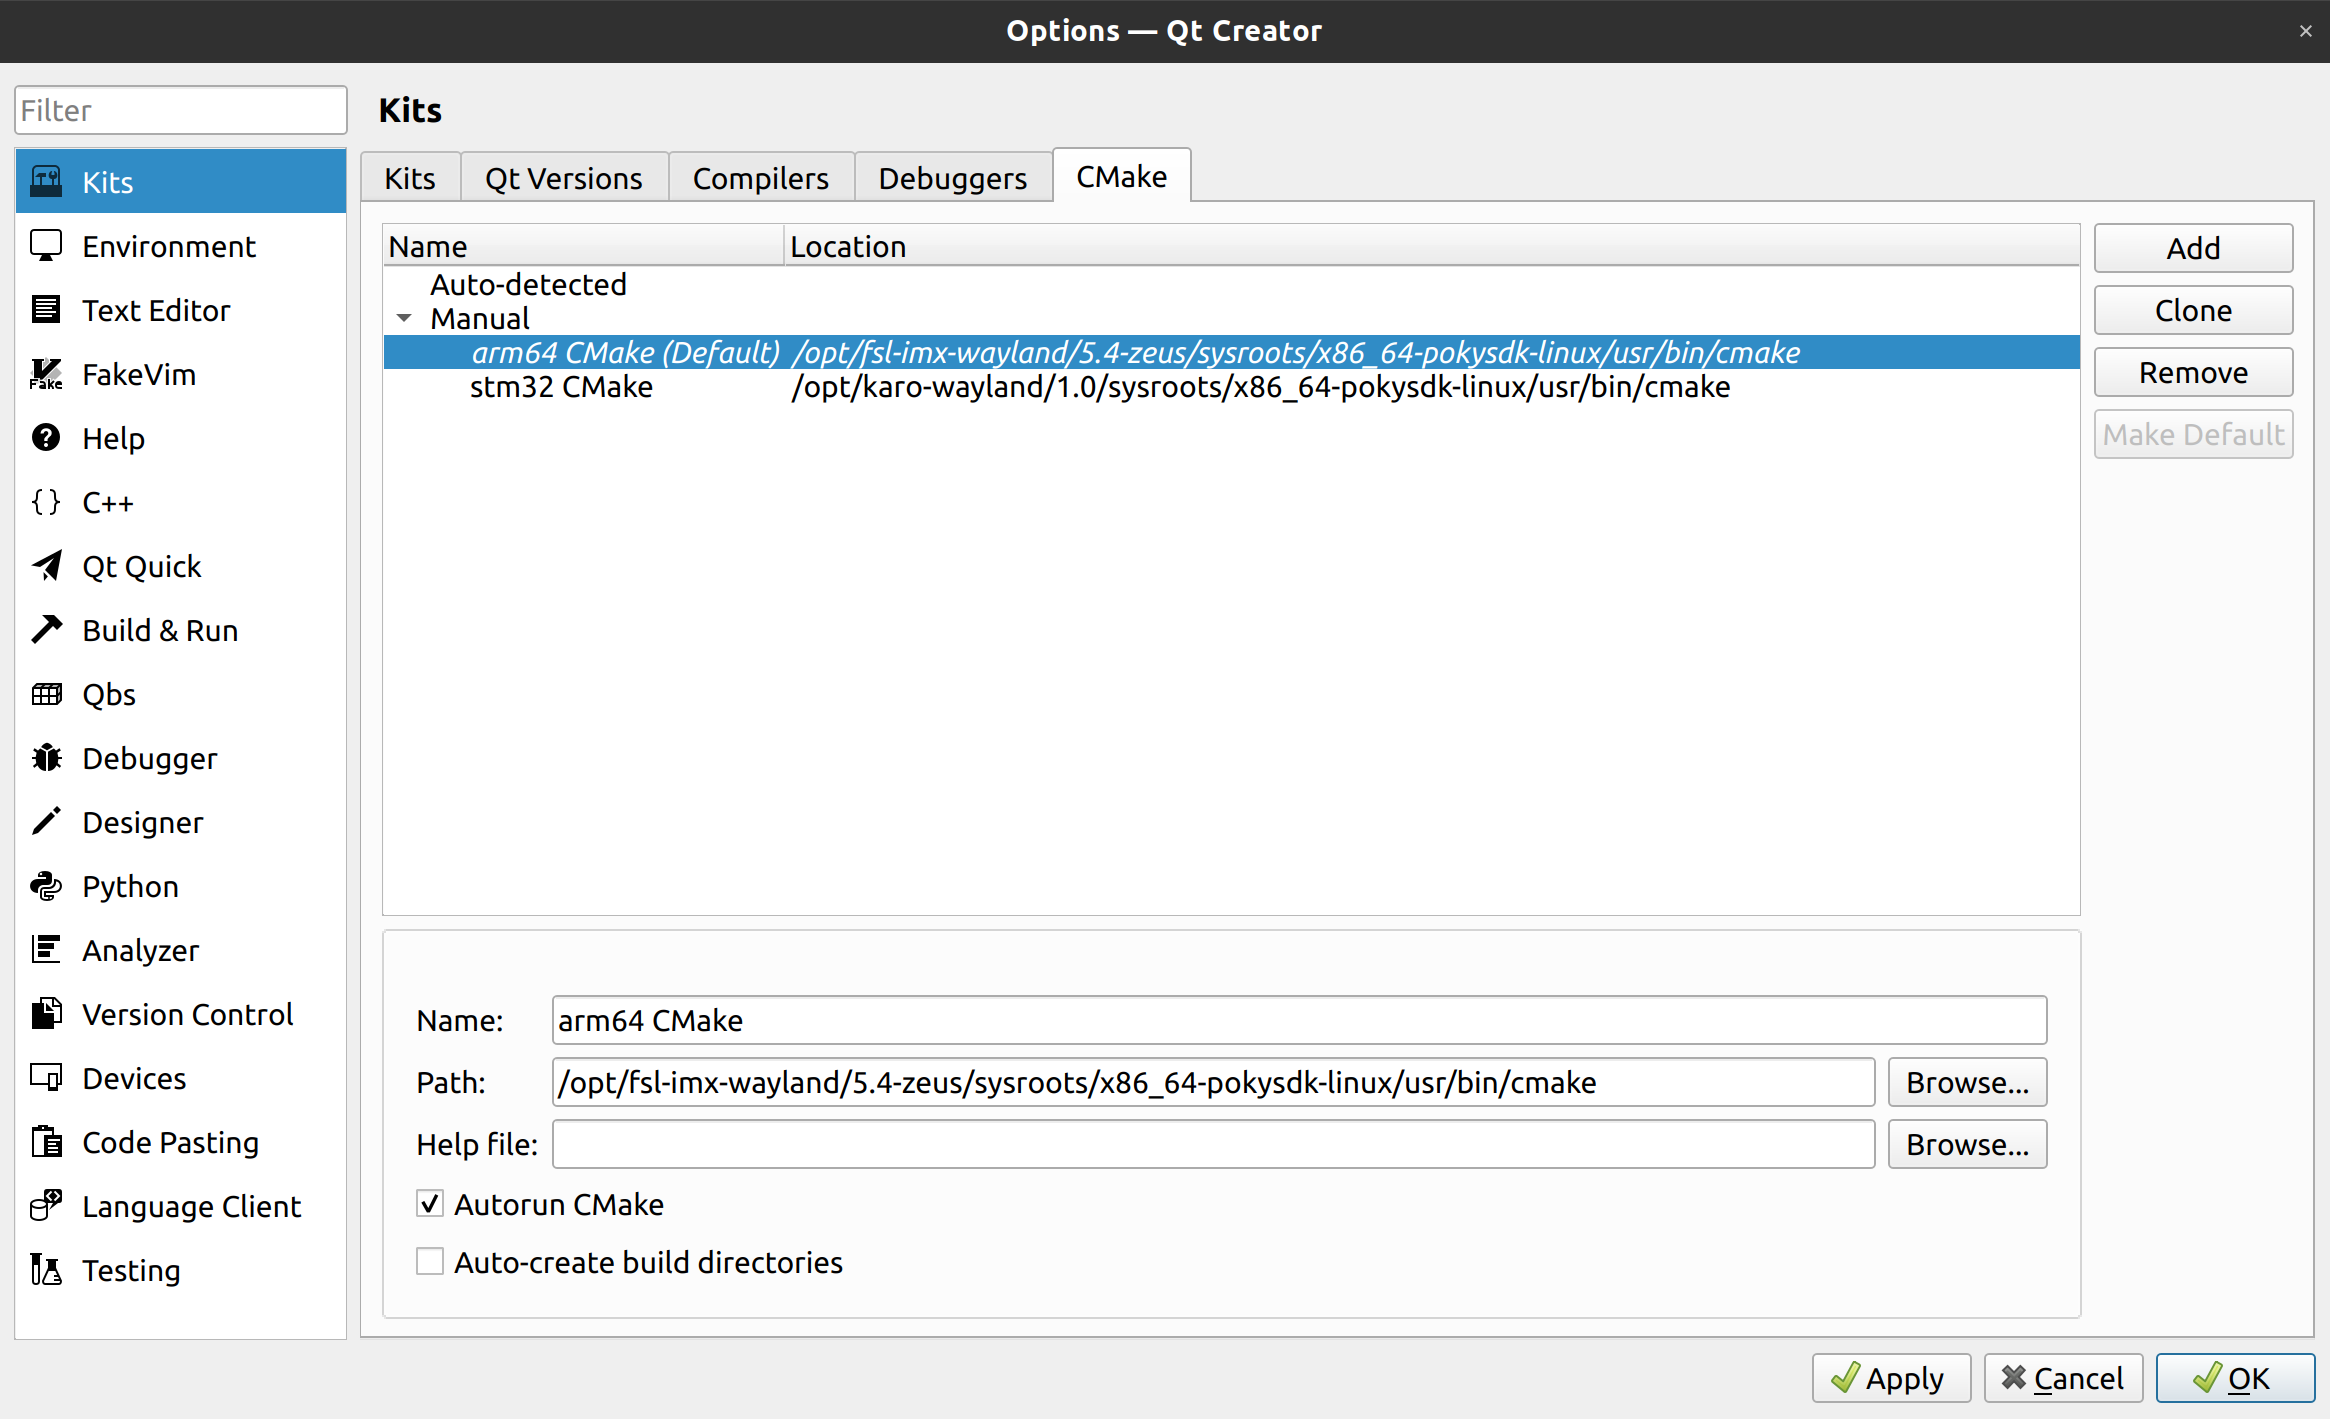
CMake
Device
Note
For the next step it is required that your target has a working ethernet connection to your host.
Tip
To find out the IP of our target, run ip a there.
Go to section Devices and choose . Follow the steps to configure your target.
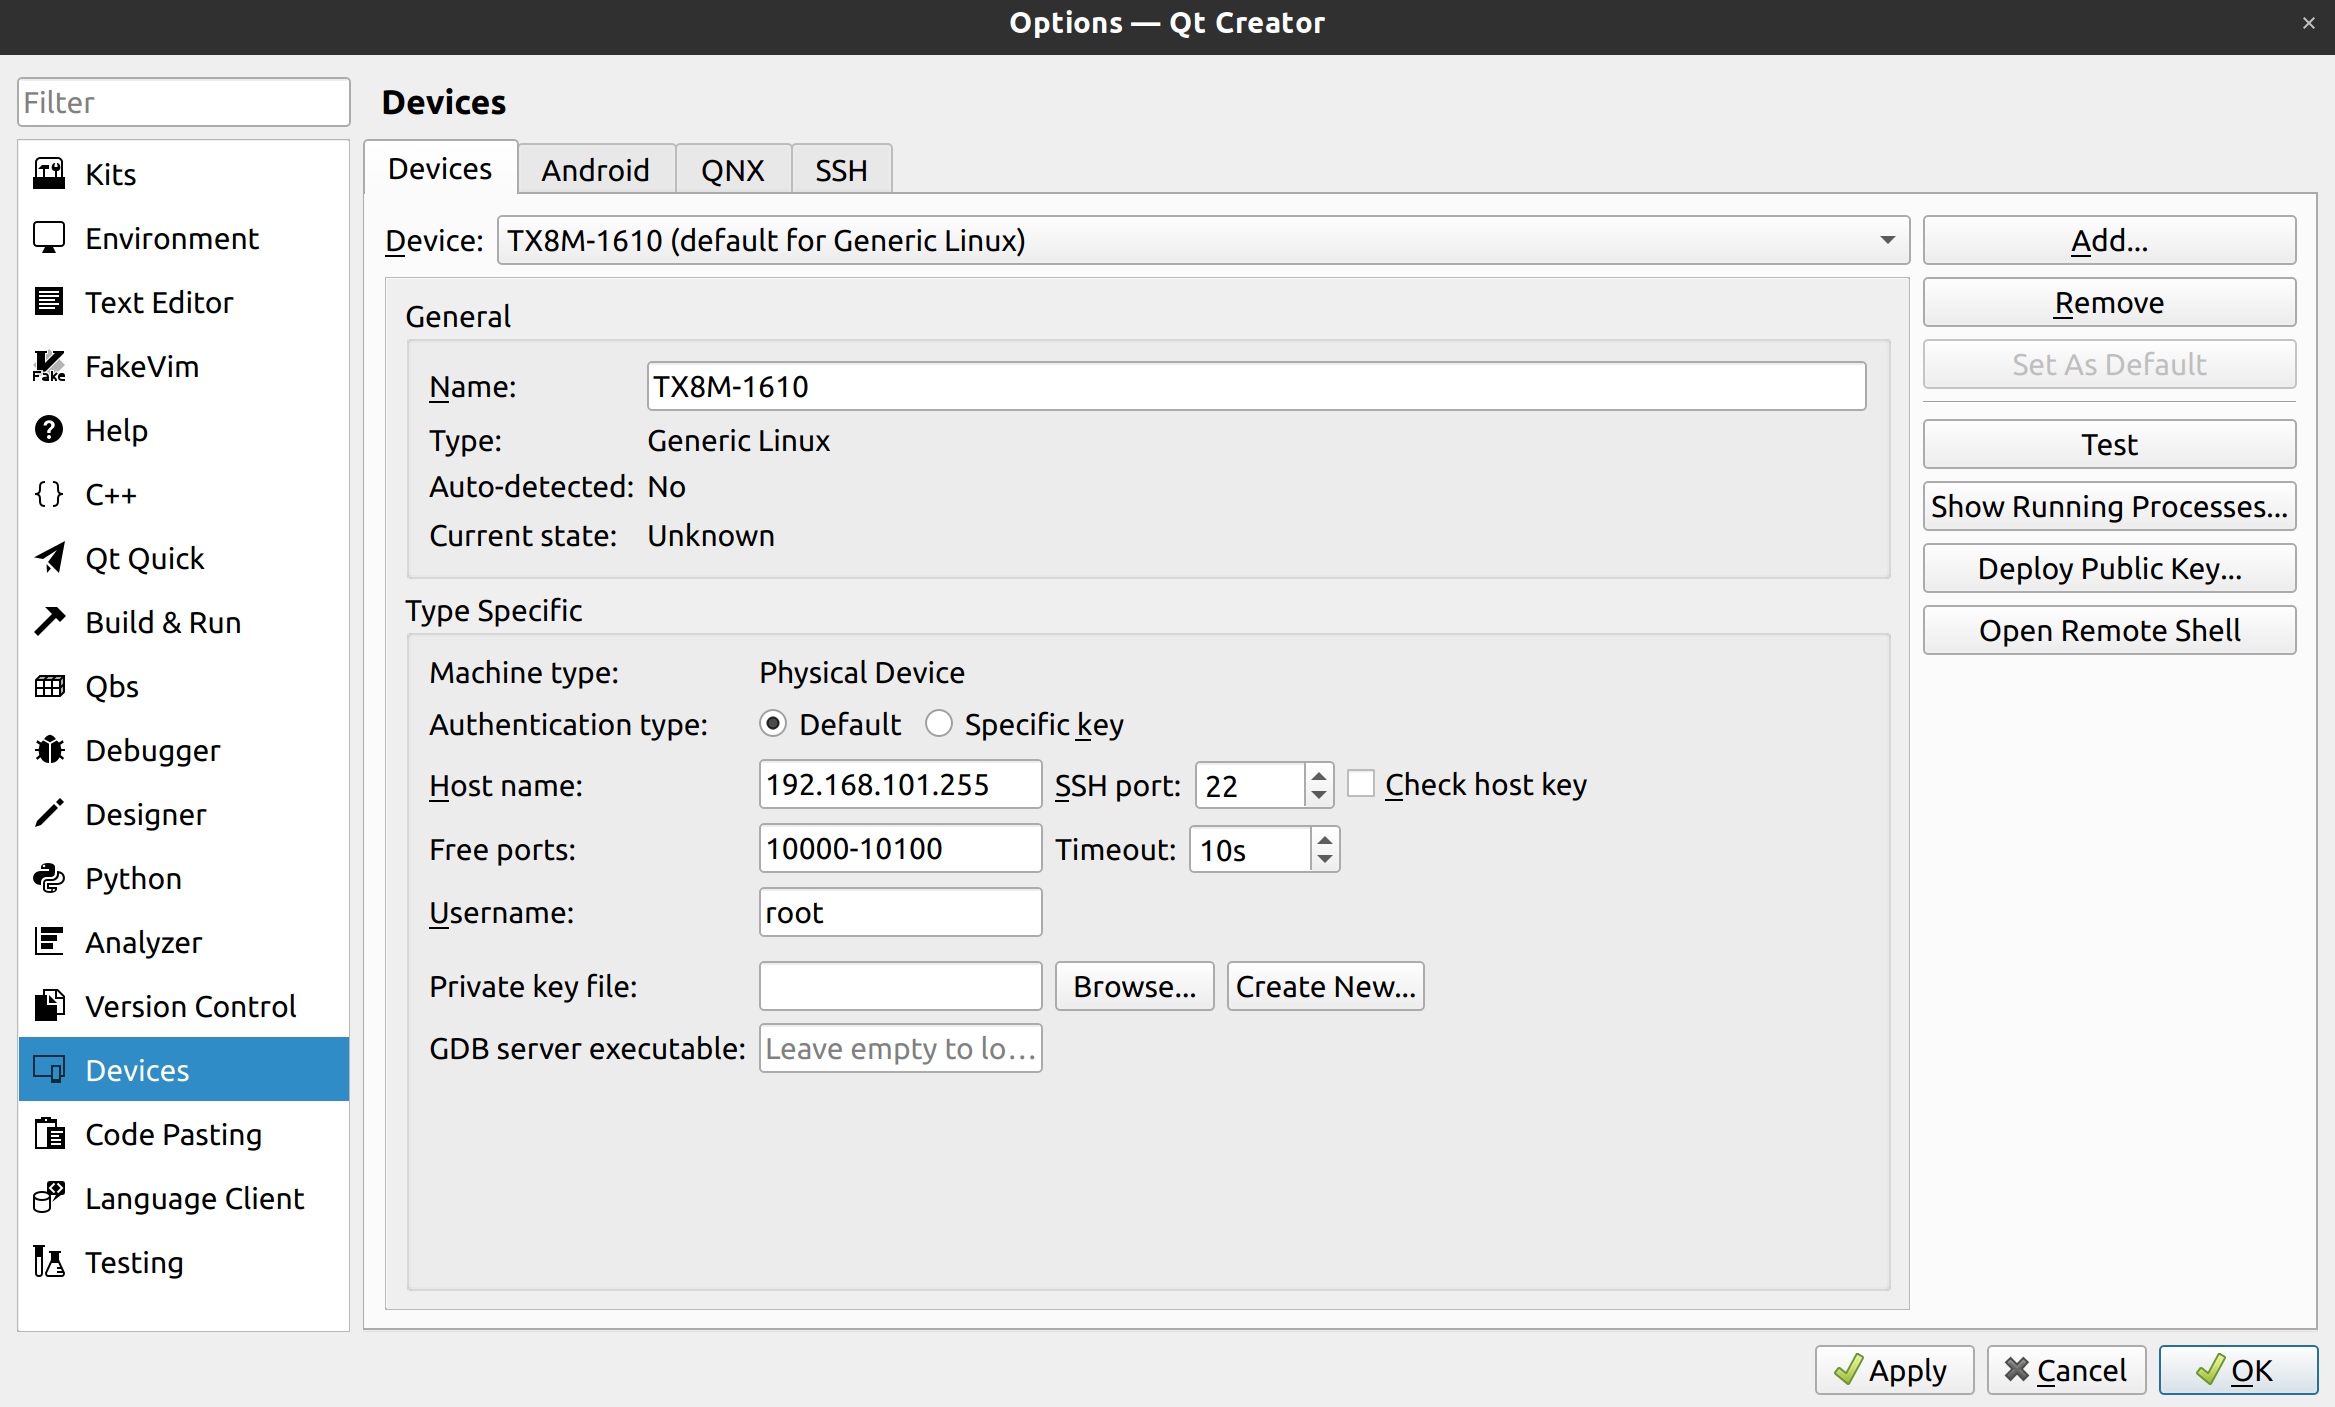
Devices
Now in Kits section, add a Kit with all the previously configured parameters.
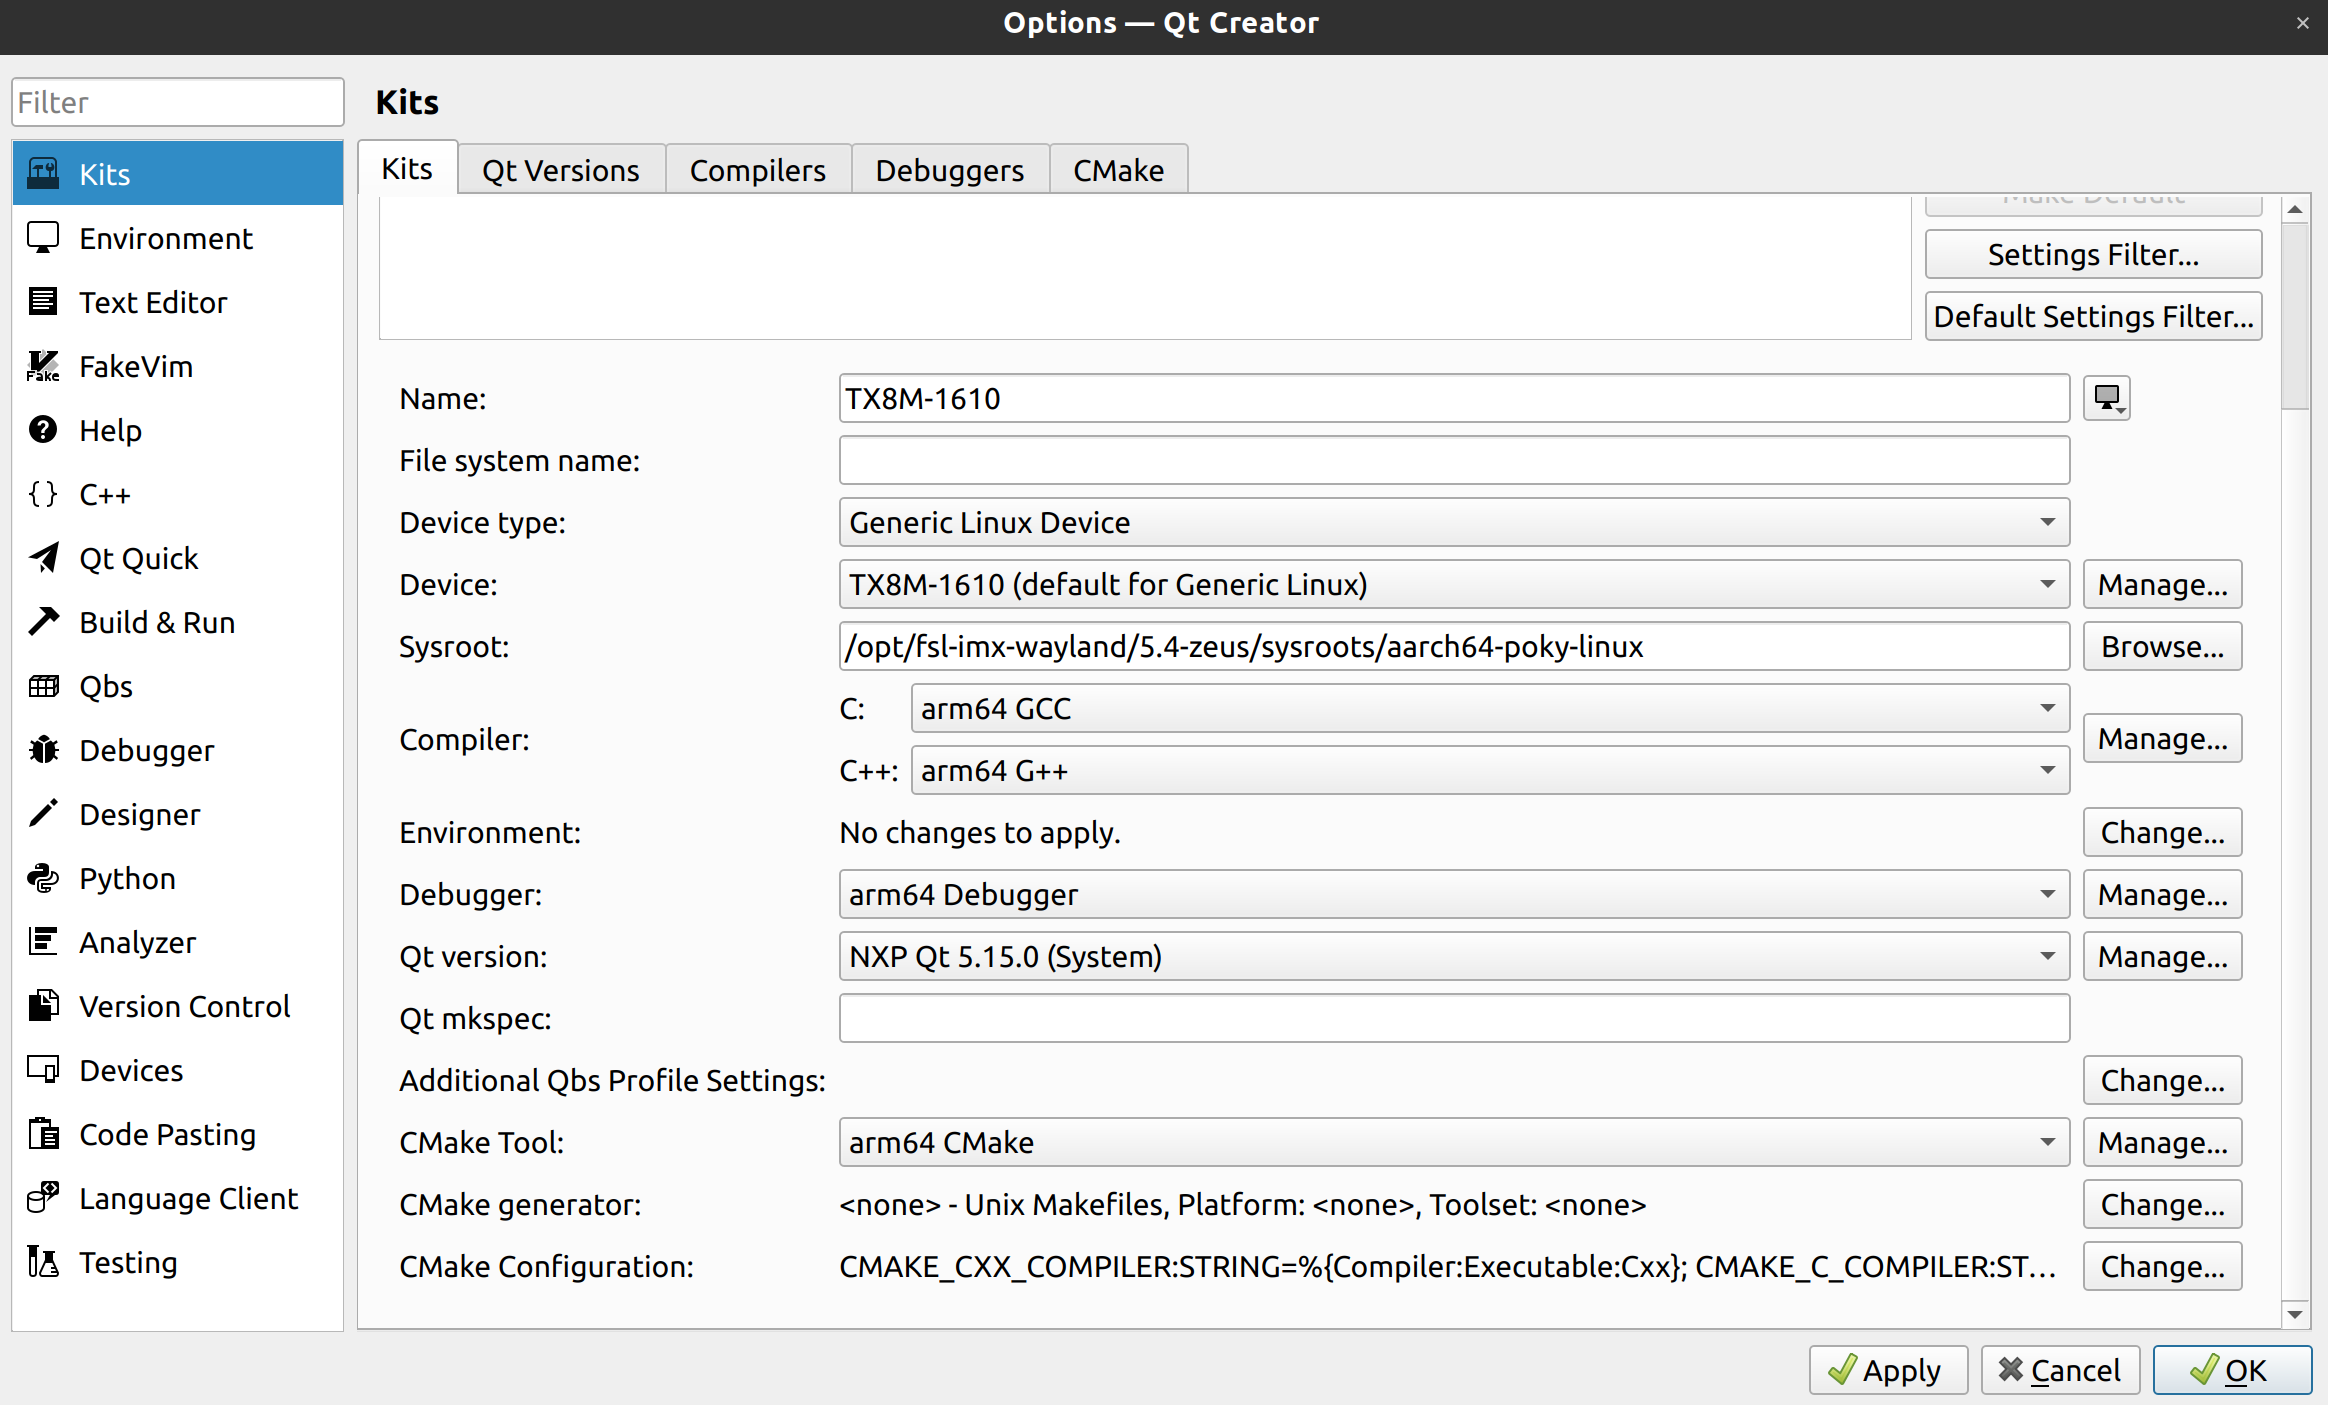
Complete Kits
Press Apply and close the Options Window.
Hello World
Create a new project using the project wizard on QTCreator start screen clicking + New.
Select e.g. “Qt Quick Application” and go through the steps. Make sure you select the right Kit.
Once created you should be able to run project on your target.

Run