VS Code Cross-Compilation
Introduction
With a toolchain created by one of our Yocto Guide BSPs you are able to setup Visual Studio Code for Cross-Compilation and Cross-Platform Debugging with GDB.
“Visual Studio Code is a source-code editor made by Microsoft for Windows, Linux and macOS. Features include support for debugging, syntax highlighting, intelligent code completion, snippets, code refactoring, and embedded Git. Users can change the theme, keyboard shortcuts, preferences, and install extensions that add additional functionality.
In the Stack Overflow 2021 Developer Survey, Visual Studio Code was ranked the most popular developer environment tool, with 70% of 82,000 respondents reporting that they use it.”
(Wikipedia)
Prequisites
Hint
The following example was made with a TX8M on a Linux host.
Get VS Code
Go to https://code.visualstudio.com/ and follow the instructions to install the IDE for your system.
Host Packages
Install neccessary host packages:
sudo apt update
sudo apt install build-essential gdb gdb-multiarch
Toolchain Setup
Build the desired image for your target. Refer to our Yocto Guide.
Note
If you want to use karo-image-minimal you have to edit conf/local.conf.
Make sure to add ssh server and comment the line which makes the rootfs readonly.
# EXTRA_IMAGE_FEATURES += "read-only-rootfs"
(...)
IMAGE_FEATURES:append = " \
      ssh-server-openssh \
"
Then run:
bitbake <image>
Flash the image to your board. Refer to Flashtools.
Build the SDK for previously image. Run inside your
<build-dir>:
bitbake <image> -c populate_sdk
Install the SDK to your host (example):
tmp/deploy/sdk/karo-wayland-glibc-x86_64-karo-image-weston-cortexa53-crypto-tx8m-1620-toolchain-5.15-kirkstone.sh
karo-wayland (Ka-Ro Linux BSP with wayland backend) SDK installer version 5.15-kirkstone
========================================================================================
Enter target directory for SDK (default: /opt/karo-wayland/5.15-kirkstone):
You are about to install the SDK to "/opt/karo-wayland/5.15-kirkstone". Proceed [Y/n]?
Extracting SDK..........................................................................................
...........................done
Setting it up...done
SDK has been successfully set up and is ready to be used.
Each time you wish to use the SDK in a new shell session, you need to source the environment setup script e.g.
$ . /opt/karo-wayland/5.15-kirkstone/environment-setup-cortexa53-crypto-poky-linux
VS Code Project Setup
Project Folder
Choose a project folder and open VS Code inside it.
mkdir ~/hello-world
cd ~/hello-world
code .
Install Extension
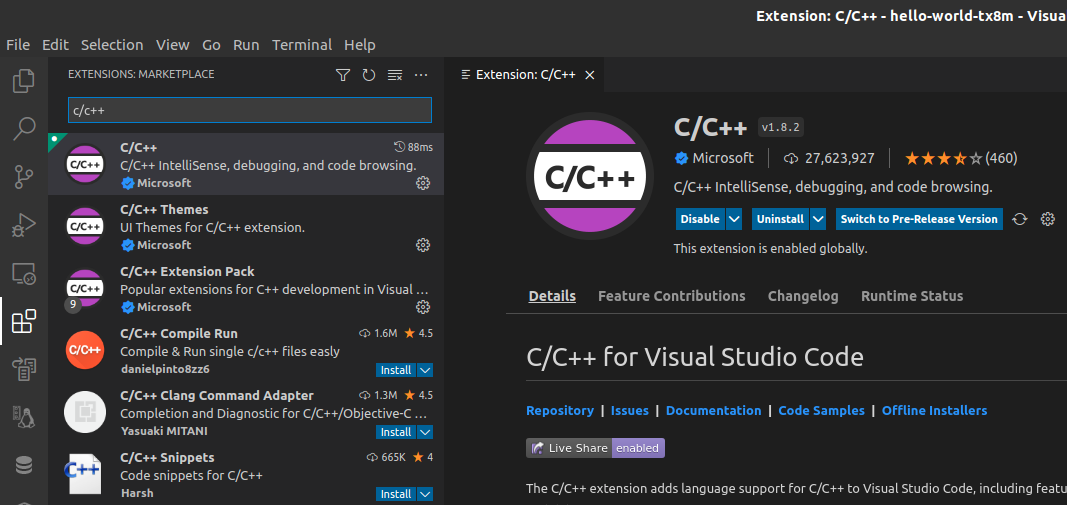
Install the C/C++ extension for debugging.

You can instead run:
code --install-extension ms-vscode.cpptools
Sources
Note
Example Project
Download our cross-hello-world.patch and apply it inside the hello-world directory:
cd ~/hello-world
patch -p1 < cross-hello-world.patch
This will create files and a directory structure:
.
├── cross-compile.sh
├── deploy.sh
├── hello-world.c
├── Makefile
└── .vscode
   ├── launch.json
   ├── settings.json
   └── tasks.json

1 directory, 7 files
Settings
You now have to fit the .vscode/settings.json file to your needs.

It’s enough to fit the target’s IP-address and the path your SDK was installed to.
Tip
If you’re interested in understanding the whole task and cross-compilation setup, go through the single files. They’re mostly self-explanatory.
More information about tasks in VS Code can be found in the official documentation.
Cross-Compilation
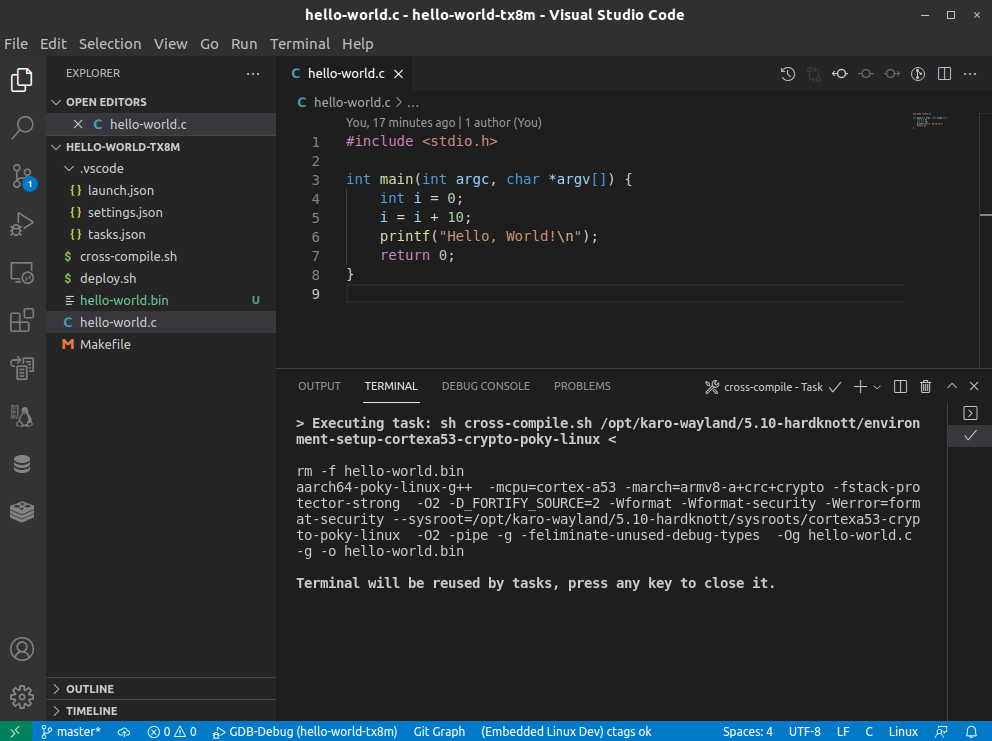
Open the hello-world.c file and hit CTRL + SHIFT + B.
This will execute the cross-compile.sh script and generate the hello-world.bin output file.

Deploy to Target
Now ssh-copy the generated binary to your target and execute it.
scp hello-world.bin root@<target-ip>:/root/
On the target:
/root/hello-world.bin
Hello, World!
Remote Debugging
Note
The created tasks, cross-compile.sh and deploy.sh in the hello-world project take care of cross-compiling and deployment automatically.
Simply hit F5 to start debugging. The debugging task depends on compilation and deployment task, so they will be run first.
The script starts GDB on your target and the debugger stops at the execuction of main:

Breakpoints
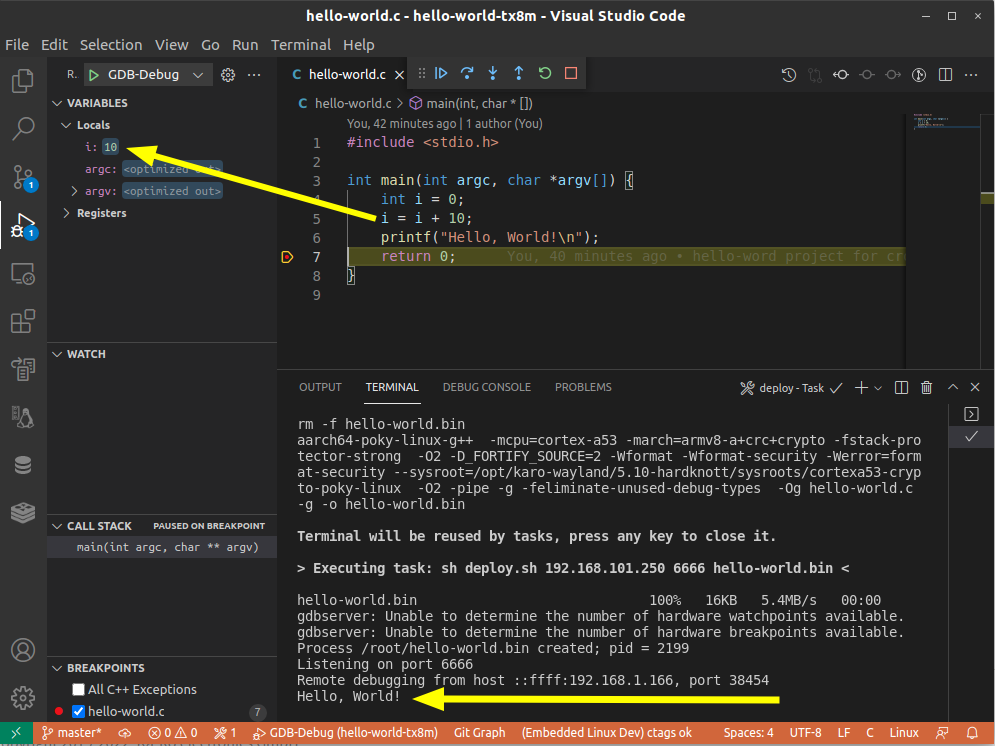
You can now set a breakpoint by clicking in the space between line numbers and side panel. After this click “Continue” or hit F5 again.

You will now notice that the value of variable i has changed and Hello, World! was printed to console.

Another Continue or hit of F5 will finish the execution.